I’ve been using a Mac as my daily driver for work for the last few years. While there’s nothing particularly special about MacOS that I love (in fact there’s quite a bit I don’t like), it’s honestly been the terminal and the underlying Unix based operating system that keep me glued to it. With Homebrew, command line tools just work. Python and Node dev environments just work. And using iTerm2 with oh-my-zsh is the best terminal experience I’ve ever had. I often feel like I just pay the premium for Mac hardware to have a reliable and easy to configure *Nix operating system.
But lately I’ve really been wanting to get off the Mac ecosystem and start using Windows 10 on my X1 Carbon as my daily machine. With the Windows Subystem for Linux (WSL) it’s now possible to have a “native” Ubuntu command line on my Windows 10 machine to use for my CLI nerdiness. But the only thing holding me back was the lack of a nice terminal emulator (admittedly, I’m shallow and like pretty things).
This just wasn’t going to cut it:
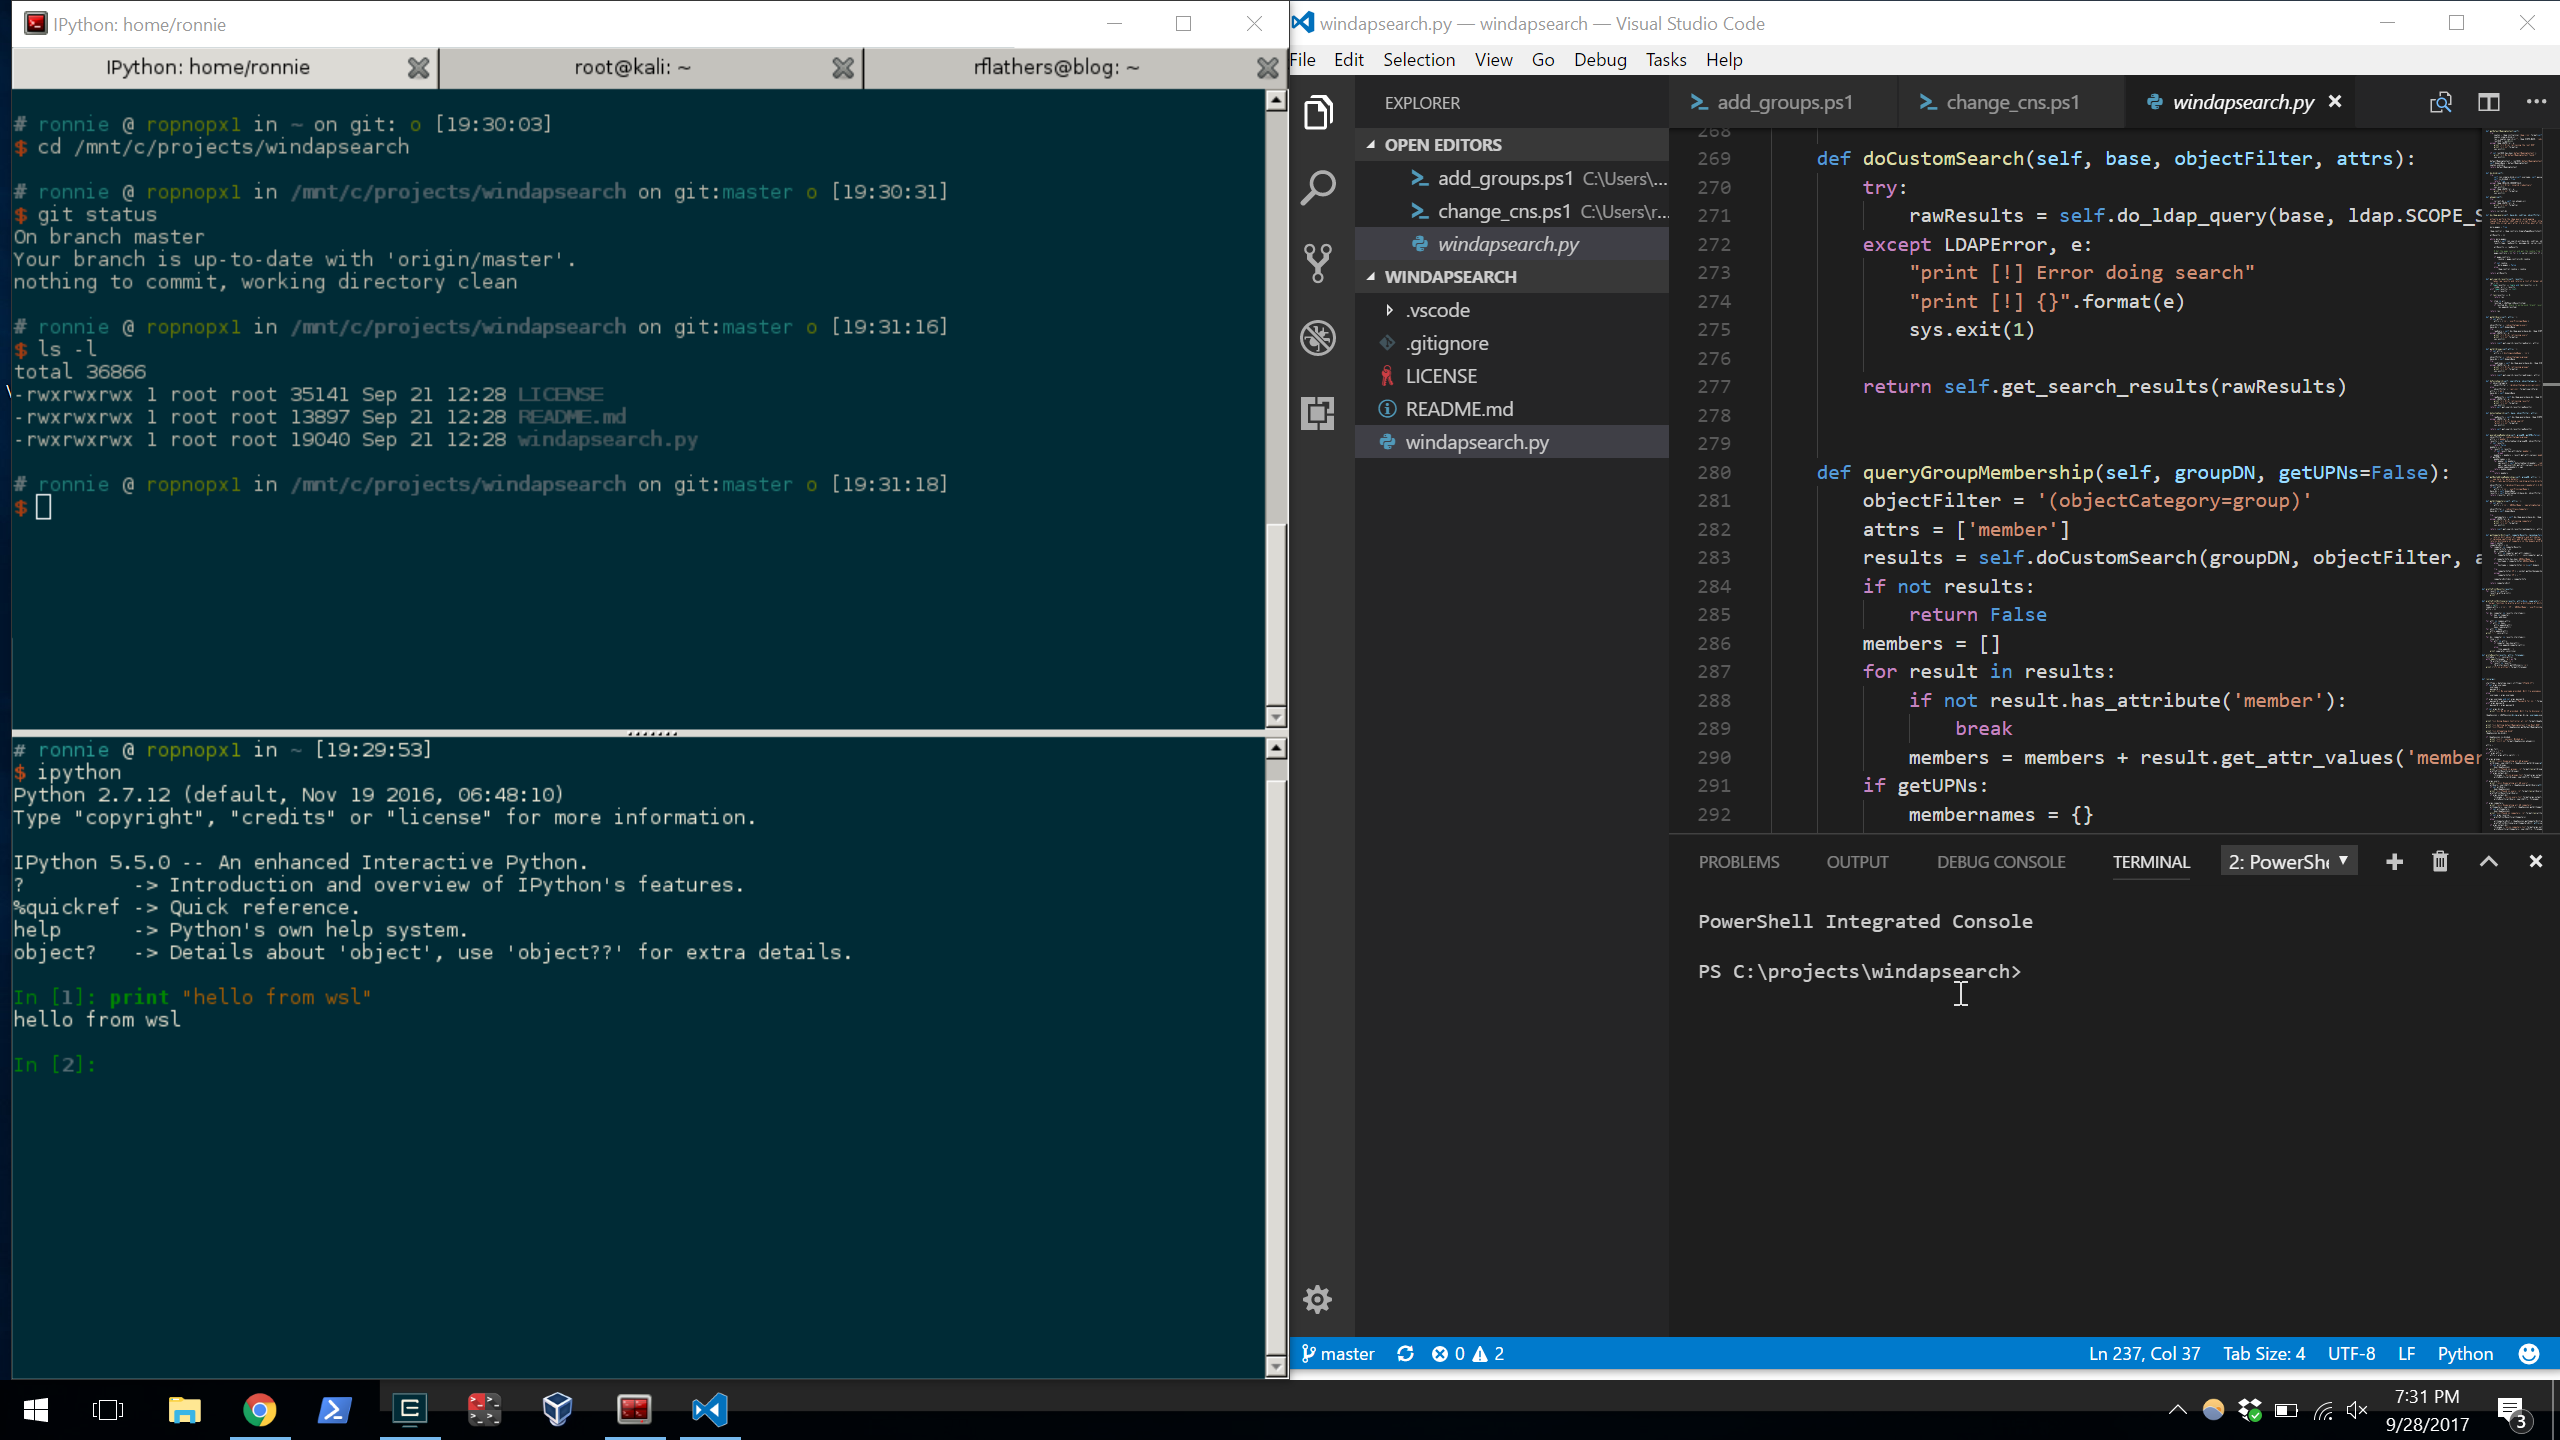
After much tinkering, I’ve ended up with what I feel is the most comfortable terminal experience I can get on Windows. It supports tabs, splits, mouse mode and has a pretty color scheme to boot:
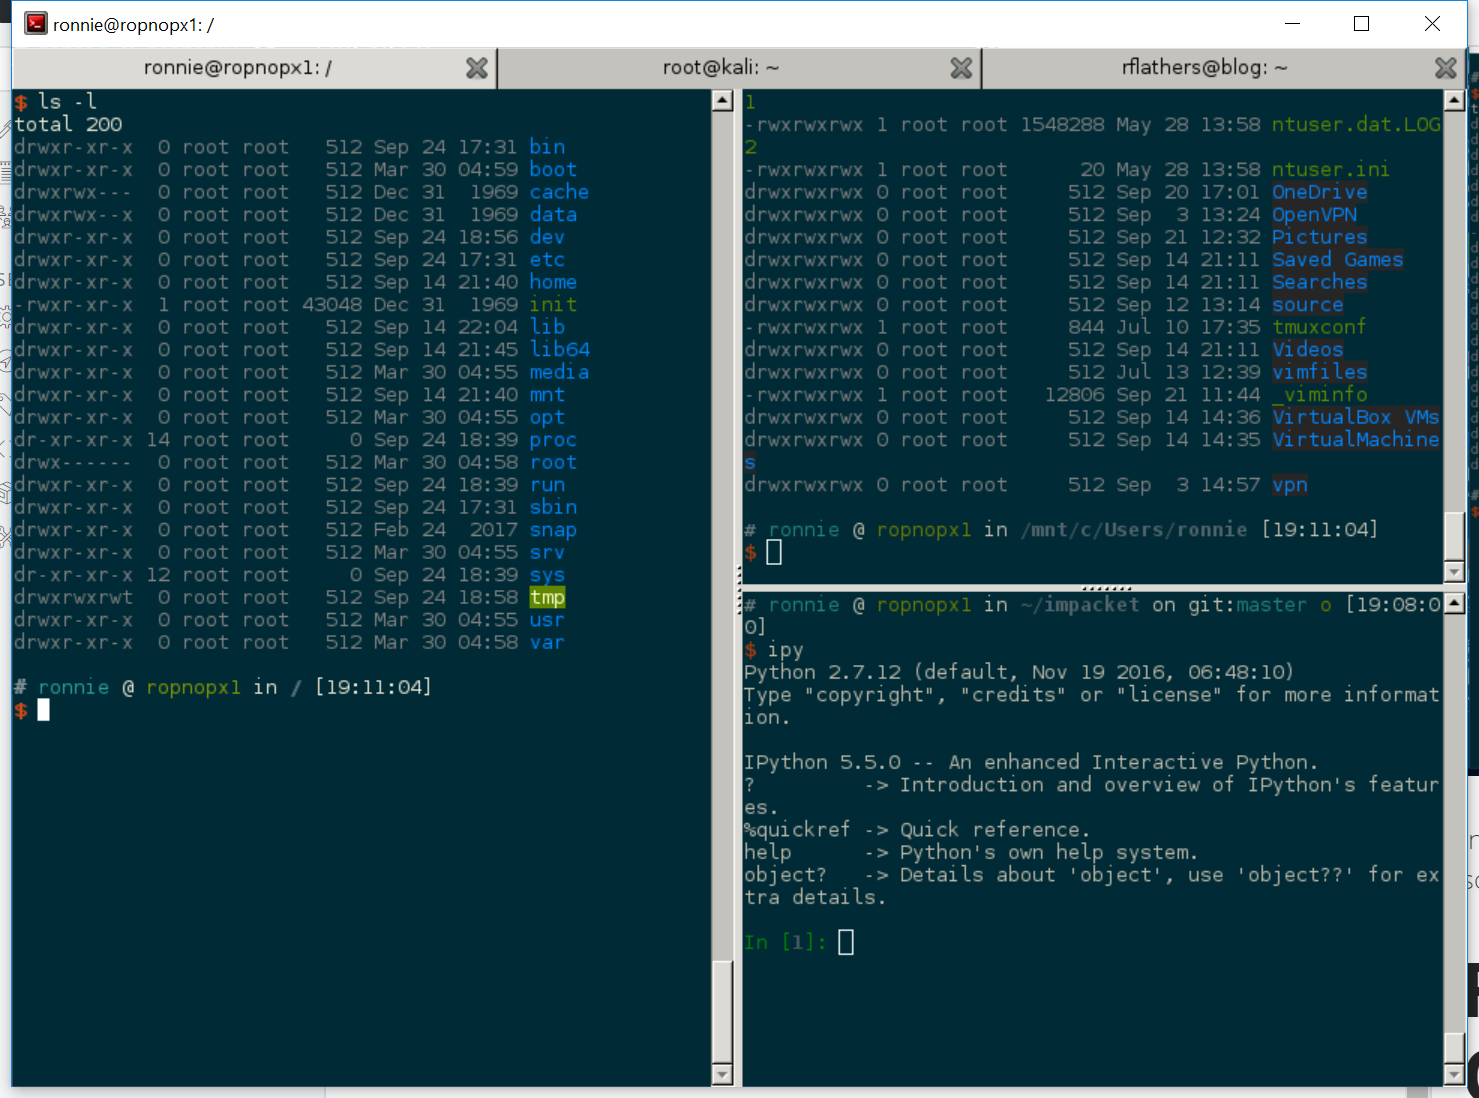
In this post, I’m going to quickly explain how I got it running and configured, and some of the other options I tried.
I really just wanted the equivalent of iTerm2 in Windows. I wanted to utilize WSL (not Cygwin) and at a minimum needed:
- Pretty colors and fonts
- Tabs (non-negotiable)
- Working mouse support for scrolling and Vim/Tmux
- Tmux support and auto resizing
- Sane copy/paste
I think I tried every major Windows terminal app I could find. Each had their own drawbacks and I eventually gave up. Some of the ones I tried:
- Cmder
- Pros: Tab support. Portable. Works with cmd and PS nicely
- Cons: Lacked mouse support in Tmux; resizing Windows was funky
- ConEmu
- Same as Cmder – not as pretty though by default
- Wsltty
- Pros: Window resizing and mouse worked great
- Cons: No tabs!
- Mintty
- Same as Wsltty, just harder to configure initially
- Hyper
- Pros: Screenshots online made it look pretty. Apparently has nice plugins
- Cons: Buggy as hell. Never got to properly work. Plugins based on NPM failed all the time
- Babun
- Pros: Lots of features out of the box
- Cons: Based on Cygwin, not WSL
- Xshell
- Pros: ??
- Cons: Didn’t support WSL Bash. Not free
- MobaXTerm
- Pros: A lot. Love this app for managing remote connections (e.g. RDP)
- Cons: Not the best for local shells. Mouse/tmux support not working
The closest I got, and one that I used for a while was Cmder:
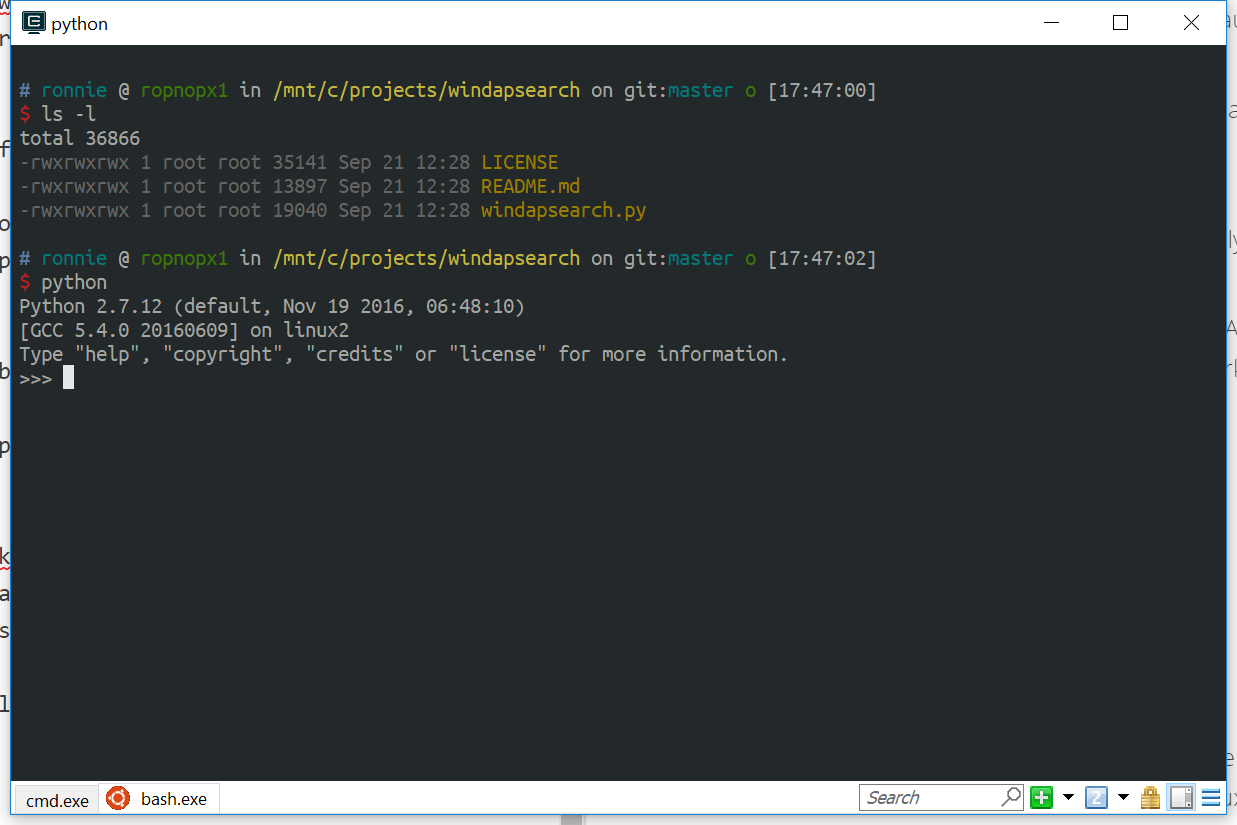
Unfortunately, when I started using Tmux it became a problem. I could never get mouse mode to work (scrolling or selecting panes), and resizing windows was problematic. I’d end up with screens like this a lot:
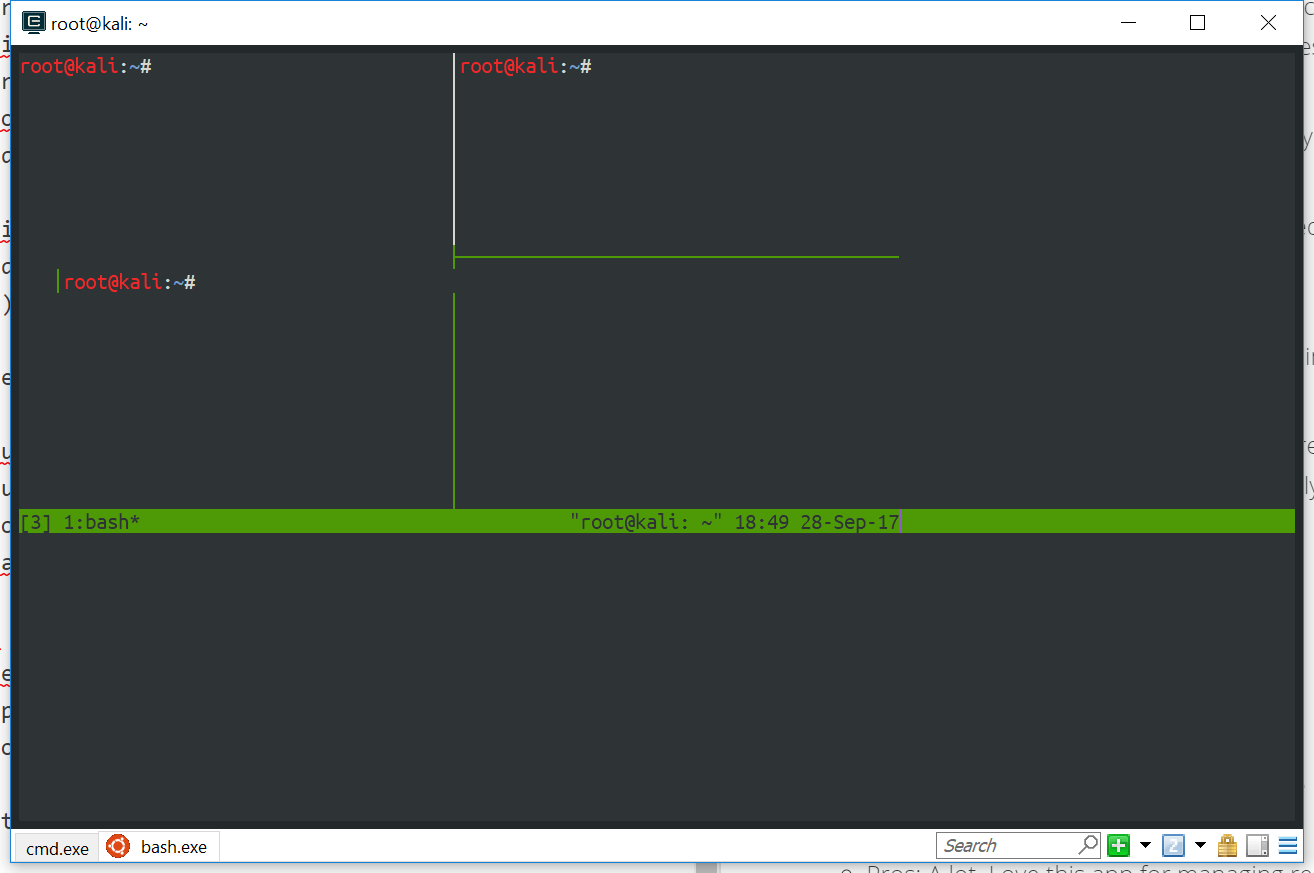
Not gonna cut it for me (though I still do use Cmder regularly for when I need to run Windows cmd.exe)
What I realized in my search and multiple trials was there just wasn’t a good Windows terminal emulator. When I was about to give up, I saw a post on Reddit about someone who got XFCE working on WSL Bash. That was way overkill for what I wanted to accomplish, but reading through the post I learned/realized that if I had an X Server running on Windows, I could use GUI Linux terminal emulators “natively” on Windows! That opened up a ton of possibilities, and one of my favorite Linux terminals, Terminator, was now a possibility!
Installing an X Server
To run an X Window application, I needed to have an X Server installed and running on my Windows 10 machine. After researching, it seemed the two most popular options are:
I went with VcXSrv since it looked like it was more actively maintained, but I tried both and they work the same.
After installing, VcXsrv creates a desktop shortcut to start the server in multi-window mode through the following command:
|
|
A taskbar icon shows it’s running, and we can verify by looking at netstat:
|
|
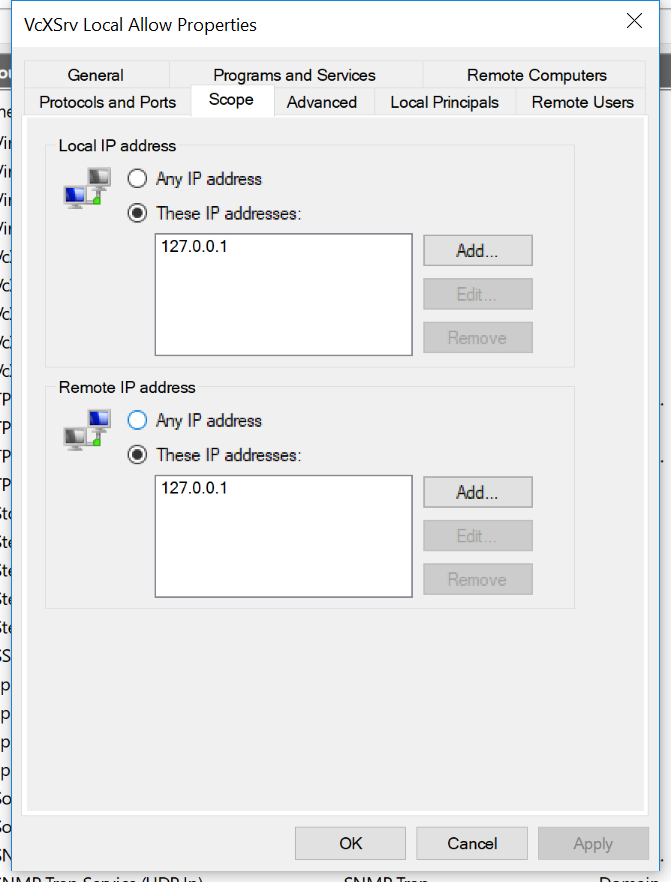
It’s important to note that VcXsrv is listening on all interfaces and requests a blanket firewall exception for private networks. AFAIK there is no way to only force it to listen/accept connections from localhost only, so I disallowed the firewall exception request and configured a custom rule to only allow traffic from 127.0.0.1
Configuring Terminator
Once VcXsrv was installed and configured to allow access from 127.0.0.1, the next step was to install Terminator on WSL Bash:
|
|
If I didn’t want to use terminator, any other terminal emulator should work, including Gnome Terminal (which Terminator is based on), Urxvt, or xterm.
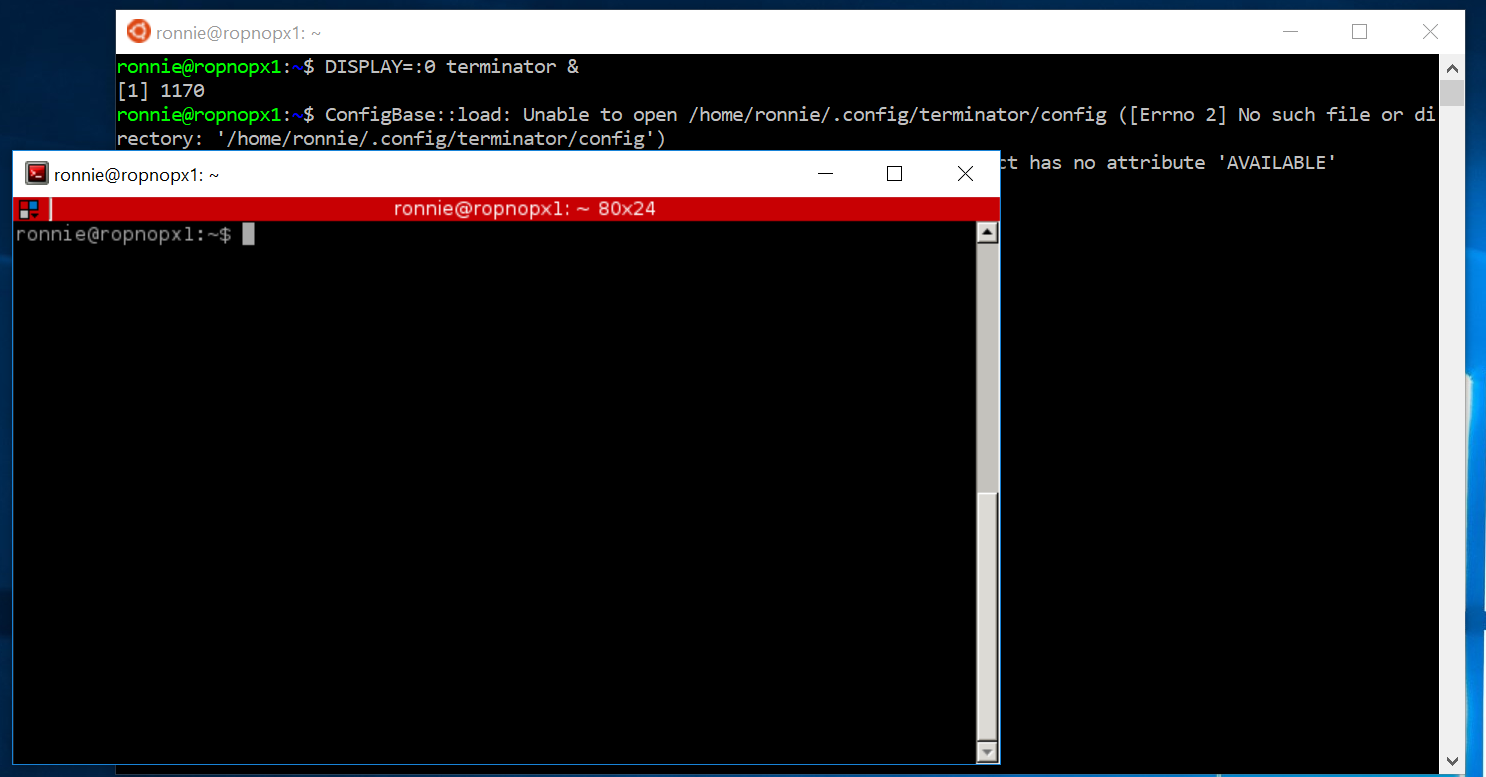
After it installed, all that was left was to try launching it by specifying the X Display to connect to (:0)
|
|
And a nice Terminator windows popped up 🙂
Installing Zsh
The next step I did was install Zsh with oh-my-zsh. Installation is straightfoward:
|
|
I set the theme “ys” in .zshrc
The only “gotcha” about using Bash in WSL is it will always run Bash instead of Zsh. To get around that, I add this to the end of my .bashrc which will launch zsh instead when it starts up:
|
|
Terminator Colorscheme
The next thing I chose to do was change the default Terminator colorscheme to Solarized Dark. The easiest way to do this IMO, is to use the awesome node package base16-builder
|
|
Dircolors
It was looking good so far, but the dircolors were still awful:

I found Solarized dircolors on Github and downloaded them to .dir_colors
|
|
Then lastly, added this to my .zshrc to eval the Solarized dircolors on startup:
|
|
Finally I had a pretty enough terminal to my liking. Still no iTerm2, but pretty damn close IMO
The final hurdle was figuring out a way to launch Terminator directly without having to open a Bash window first and then typing DISPLAY=:0 terminator &
From the command line, I could launch bash with the -c parameter and it would work:
|
|
However, this still required me to open a command window. After a lot of trial and error and research on StackOverflow, I figured out how to launch a hidden command window using the WShell Object in VBS. The final script I used is here:
With that script, I was able to create a Desktop shortcut to wscript.exe and execute it with the following command:
|
|
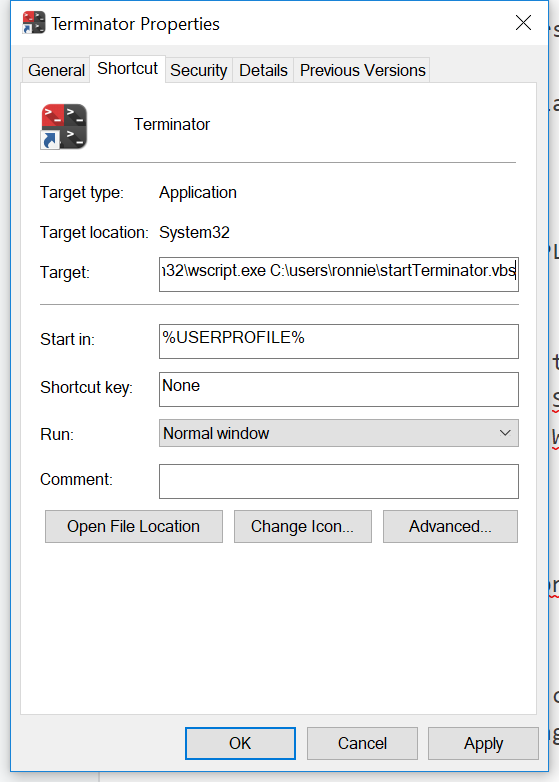
The last step was to find a pretty Terminator Icon file for the shortcut and add it to my taskbar for quick launching.
One final note is the “Start In” option. It’s impossible to have Termiator start in my Linux home directory through this method since that path is not “known” to Windows. To get around it, I added this to my .zshrc so it CD’s to my home directory on startup:
|
|
Hacky, but it works.
I’ve been using Terminator for WSL for a while now and am loving it. It’s the best terminal experience I’ve been able to get on Windows so far. As long as I have VcXsrv running I’ve had no issues with launching it and it runs very smoothly. Terminator is very configurable, and I’ve configured and changed some of the keyboard shortcuts to suit my liking. Overall I love having the splits/panes/tabs and when I’m SSH’d into multiple boxes through WSL it’s amazing. My workflow now is generally running VS Code on my Windows, with multiple Terminator panes open to /mnt/c/projects/whatever and being SSH’d into my lab. Love it.
Hope this helps someone! Let me know if you have a different/better solution!
-ropnop
